Tomb Raider (1996) Walkthrough

This is the walkthrough and video walkthrough for Tomb Raider I (1996), the first game. Find all the secrets and puzzle solving below. The video walkthrough was extracted from Youtube, with the permission and collaboration of the user Stella (text) and LaraPL (video).
1. Caves | 2. City of Vilcabamba | 3. Lost Valley | 4. Tomb of Qualopec | 5. St. Francis Folly | 6. Colisseum | 7. Midas Palace | 8. Cistern | 9. Tomb of Tihocan | 10. Temple of Khamoon | 11. Obelisk of Khamoon | 12. Sanctuary of Scion | 13. Natla Mines | 14. Atlantis | 15. The Great Pyramid | Croft Manor (Tutorial)
3. Lost Valley
Follow the tunnel to an open area with rough stone pillars and a stream. Hop into the water and allow Lara to be carried over the falls into the pool below. Climb out of the water on the small ledge to the right of the falls (when facing it). From here you can see, and kill, 2 wolves on the other side of the pool and they can’t reach Lara. Alternately, from the level entrance, turn right and make your way down the stepped rocks to the pool, shooting the wolves before you reach the bottom.
Go through the cave opening opposite the waterfall, where you’ll encounter another wolf. When it’s dead, continue through the twisty passage until you come to a wall with flat, stepped blocks and an opening high above. You’ll climb up in a minute, but if you want all the kills, first follow the tunnel to the right, where you’ll encounter 3 more wolves. Once you’ve drawn them out you can kill them from the top of the slope at the cave mouth. Now return to the raised opening and climb the flat blocks to reach it.
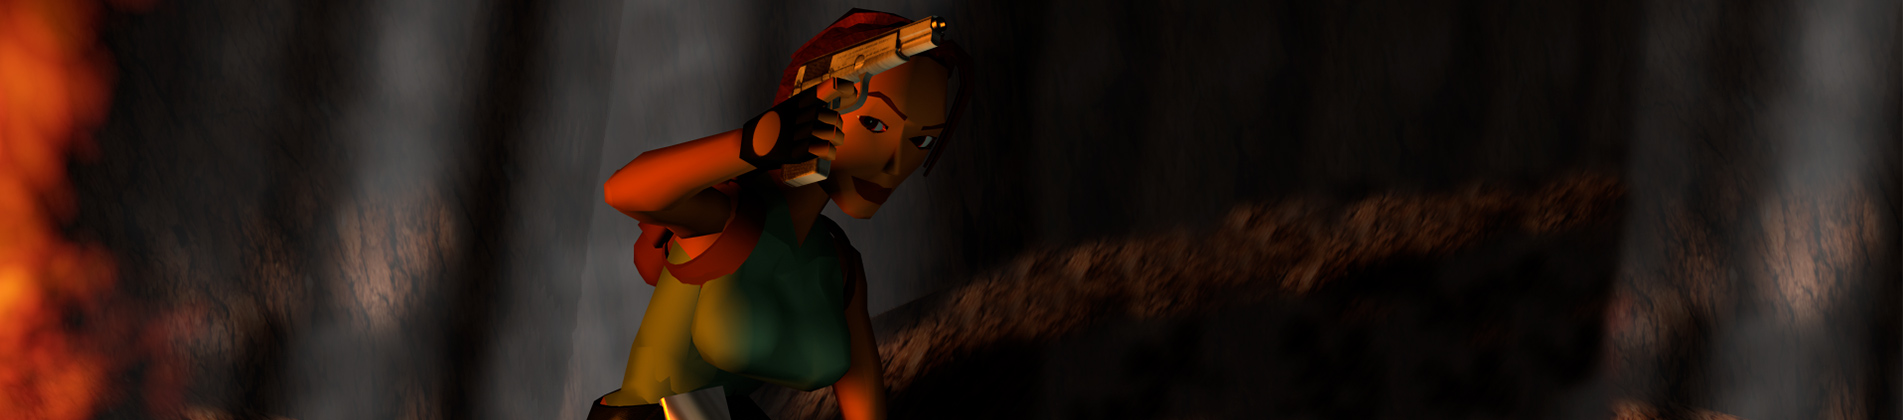
At the top, continue forward. Pick up a large medipak left behind by some hapless traveler. Continue forward and climb down into a green valley. Proceed with pistols drawn. If you go slowly, you’ll hear, then see the first velociraptor approach from the greenery ahead. Backflip while shooting and it should fall before it reaches Lara. Or, if you really want to play it safe, run back to the rocks, climb up and shoot it from safety.
Now continue with caution into the valley. You’ll encounter another raptor as the valley widens. Kill it then take a careful look around. See the rather large, three-toed footprints? Notice the broken wooden bridge spanning the valley? Feel the ground begin to shake? Nope, it’s not an earthquake. That’s a Tyrannosaurus Rex. If you want to go head-to-head, give yourself plenty of room to maneuver, don’t let him get Lara in a corner, keep moving and keep shooting. And watch out for the head; he can grab Lara in that big mouth, killing her with one bite.
If you want to play it safe, run into a cave along the right-hand (east) wall of the valley. Don’t pick the first alcove; it’s too shallow, and the T. Rex can easily reach Lara. Instead, choose the ground-level opening just below the right side of the broken bridge. Follow this passageway, which is roughly U-shaped. About halfway in you’ll encounter another raptor. Kill it and keep going to a second opening higher in the valley wall. Then just wait and blast the T. Rex as he stomps by.
There’s also another opening in the right (east) valley wall a little bit farther along than the first. Lara can take cover in here, though she won’t have quite as good a vantage point for dealing with the T. Rex.
When the coast is clear, drop down and cross the valley. Pass a waterfall on the right and go underneath a stone archway. Two raptors approach. Kill them and advance forward toward building.
Before entering the temple, go for a secret. About 20 walking paces from the rock archway, on the right (north) wall of the valley, is a nearly flat rock you can climb on. Once on top of this rock, turn left and position Lara near the middle of the block, a step or so back from the edge of the next block, which juts upward. (If Lara’s feet are right against this edge, she won’t be able to jump forward.) Then take a standing jump forward to grab the edge of the higher block ahead. Pull up. Walk to the outer corner of this ledge, then take a standing jump to grab the next ledge—the greenish, slightly angled block, a bit higher and to the left. Pull up. Walk to the front left corner of the block and take a standing jump to grab the highest rock ledge. (This one has an angled block underneath supporting it.) From here, a running jump—or a standing jump from the outer corner—will get Lara on the roof of the building.
This is SECRET #1. In various spots on the roof you’ll find magnum clips, a large medipak, Uzi clips and shotgun shells. When you’ve collected the shells, go to the back corner of the roof (farthest from where you landed when you jumped over) and safety drop onto the angled stone block below. Lara will slide to the ground unharmed.
Enter the building at the front. (PlayStation users will find a save crystal inside.) Jump into the water and swim down on the right side. Follow the underwater passage to find a machine cog—the first of three. Surface and exit the building.
Examine the valley wall ahead and to the right, and you’ll find a well-lit opening with a low block in front of it. Climb up into this opening and follow the passage to the bridge, picking up a save crystal on the way. Walk to the edge of the broken bridge, hop back and then take a running jump to grab the other side of the bridge. Pull up. On the platform where the bridge is attached to the wall, you’ll find the second machine cog. Safety drop from the end of the bridge to the ground.
Go to the left (north) and you’ll find an opening in the right (east) valley wall somewhat camouflaged by vegetation. It’s roughly opposite the rock arch and the building where you found the first cog. (You may have used it earlier to hide from the T. rex. Climb into the opening and proceed to where the passage widens. Below is another raptor. You can kill it from above, then drop down into the room. Climb the stepped rocks to the right of the pool. At the top you’ll find the third machine cog. Climb down, drop into the water and follow the underwater passage and climb out of the pool to emerge back in the valley.
(NOTE: You can also enter the cave with the third cog through the small pool at the base of the waterfall; however, this makes it more difficult to kill the raptor without losing health.)
Falling into the pool you just climbed out of are double waterfalls. To the right of the waterfalls, in the corner, is an opening in the rocks. Climb up and go inside to find SECRET #2, some shotgun shells. Between the double waterfalls and the other waterfall to the left (west) are some climbable rocks. Climb up then take a standing jump forward and to the right to the flat ledge near the wall. Walk forward and jump up to grab and hang from the triangular crevice. Traverse to the right, in front of the falls, until you can pull up into the cave above. At the back of the cave on the right is a little room containing SECRET #3, magnum clips and shotgun shells. Return to the cave mouth, drop into the pool and climb out onto the valley floor.
Now, return to the far (south) end of the valley where you entered. Climb back up the white rocks, past the skeleton (where you found the medipak earlier). Climb down the other side and continue back to the pool. Climb the rocks at the left until you’re back at the landing near the stream where you began the level.
Follow the left wall past the passageway where you first entered the level. Pass the fat stone pillar, turn right and approach the stream. Now you’re going to head upstream, hopping from bank to bank. Be careful not to fall in the water. The current will wash Lara over the falls into the lake below. As long as she lands in the water she won’t take any damage, but you’ll have to climb back up and start all over again.
(NOTE: If you’re having trouble with these jumps, you might want to review the section on HOW TO SET UP JUMPS on my Strategy page. With these simple techniques you’ll almost never miss a jump again.)
First take a running jump from the starting point to the far side. Walk a few steps upstream and then turn and take another running jump back to the other side. Walk up the slope to the top where it juts out above the stream. Take a standing jump to the ledge across the water. (For this jump, be sure to start on the left side of the ledge or press Action to lower Lara’s arc as she jumps; otherwise, she’ll hit the ceiling and fall into the water.) Turn left and take another standing jump to the ledge just upstream. Turn left again to face across the stream. Position Lara at the middle or right side of this ledge, walk to the edge, and then take a standing jump to grab the opposite side. Pull up and follow the twisting passageway around to a wooden bridge. (PlayStation users can use the save crystal here.)
Cross the bridge and replace the three cogs you found in their proper spots in this machine. (You’ll notice wooden shafts sticking out where the missing cogs belong.) Throw the switch on the left to start the machine. A little ways downstream, a gate moves, diverting the stream off to one side, thus shutting off the waterfall.
Before heading down the stream bed, let’s go secret hunting. Walk to the edge of the floor near the bridge, turn around so the bridge is on Lara’s right and drop back, grabbing the edge of the floor. Traverse left and drop down onto a flattish rock. (Or, jump into the water and swim to that ledge. Enter the cave ahead to find SECRET #4, a large medipak.
Jump into the water and swim downstream to the gold gate. Turn left and climb out of the water on a landing on the right bank. Here you’ll find the remains of another explorer, along with his SHOTGUN, which may be of use to you.
Jump back into the water and swim away from the main stream and the gold gate to the end of the passageway. Make sure you’ve got full lungs, then dive under and follow the underwater tunnel through various twists and turns. There are no side passages, so just keep following the tunnel and eventually you’ll surface in a small room. This is SECRET #5, which includes a small medipak and 2 boxes of shotgun shells. No need to swim all the way back. Instead safety drop from the doorway into the dry stream bed. Go to the end (away from the gold gate holding back the water) and jump over the sloping rocks to fall safely into the pool below.
Climb out of the lake on a ledge that was previously hidden behind the waterfall. Follow the passageway to the end of the level.