Tomb Raider (1996) Walkthrough

This is the walkthrough and video walkthrough for Tomb Raider I (1996), the first game. Find all the secrets and puzzle solving below. The video walkthrough was extracted from Youtube, with the permission and collaboration of the user Stella (text) and LaraPL (video).
1. Caves | 2. City of Vilcabamba | 3. Lost Valley | 4. Tomb of Qualopec | 5. St. Francis Folly | 6. Colisseum | 7. Midas Palace | 8. Cistern | 9. Tomb of Tihocan | 10. Temple of Khamoon | 11. Obelisk of Khamoon | 12. Sanctuary of Scion | 13. Natla Mines | 14. Atlantis | 15. The Great Pyramid | Croft Manor (Tutorial)
8. Cistern
From the start, safety drop into the room below and kill a big, nasty rat. Find the movable block and push it twice into the next room. Go around to the side and push it under the switch. Climb up and throw the switch to open the trapdoor below, as well as the silver door, letting in 2 more rats. Kill them from above, then hop down and retrieve a large medipak from the small room behind the silver door.
Drop down through the trapdoor. Exit onto a ledge jutting out into a huge room with a pool, but don’t drop down to the floor just yet. First get your bearings. Ahead on the far (north) side of the room is a tiered balcony with railings on both sides. At ground level on the same wall is a small metal door. To the left (west) are two ledges with locked metal doors. Below and beyond them (also on the west side) is another small metal door at ground level. On the right (east) side is the highest balcony, and below that, an elevated walkway with a square pillar at one corner. On the same side, there’s also an opening with a ramp below it that leads down to the pool and is flanked by two gargoyles. To your immediate right (in the southeast corner) is a long, L-shaped ledge with a horizontal crevice running along it. Where to start….
Walk out to the end of the ledge at the entrance. You can probably kill the 2 rats on the ground below from here. Jump across to the short elevated walkway ahead, from which you can kill the 2 crocodiles in the pool.(You don’t have to do this first, but it will save you some difficulty later on when you enter the pool through an underwater tunnel.)
Jump back to the walkway near the entrance. Turn left, so the entrance is on Lara’s right, and then take a running jump to the ledge ahead. Kill the rat lurking there, then walk down the steps and to the right. Grab the horizontal crevice in the ledge ahead and traverse to the left until you can drop down onto a block with some shotgun shells on it. Turn and grab the crevice on the other side of the corner and keep going to the left until you can drop onto the elevated walkway below. Turn around, go to the other end of this walkway and climb onto the square pillar at the corner. (There’s a save crystal here in the PlayStation game.) From the top of the pillar, take a standing jump onto the high balcony and climb the stairs to the room at the top.
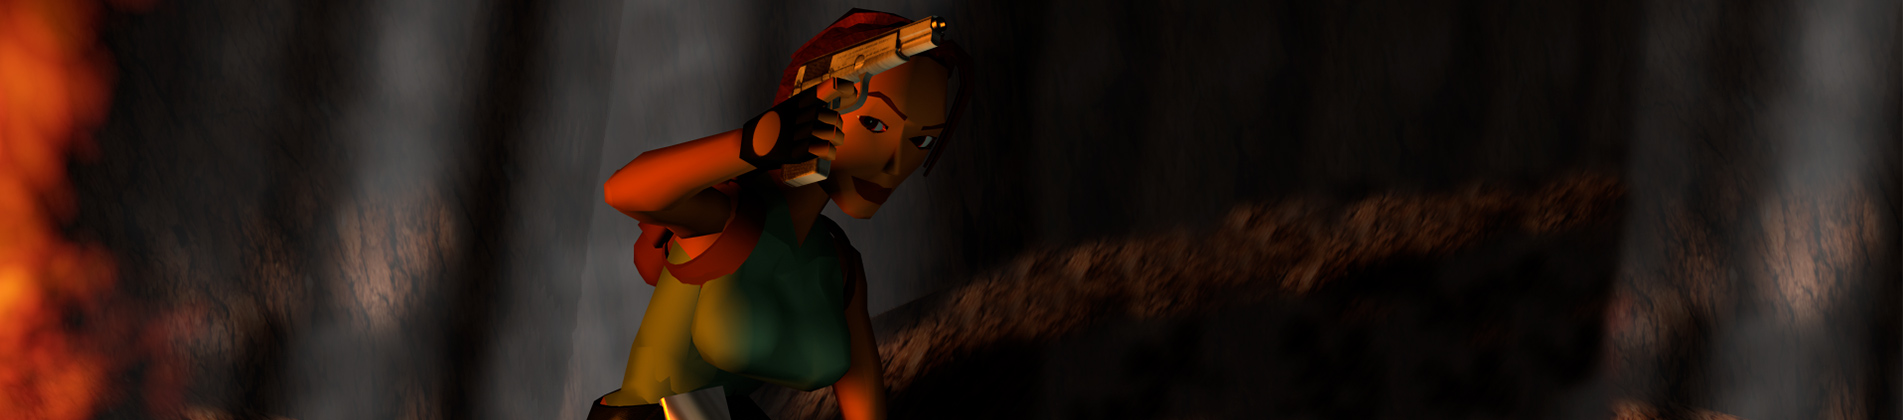
Your buddy Pierre is waiting inside on the right. To get rid of him quickly and easily, draw the shotgun, run in, blast him twice at close range and then run past him. He should then scurry out the door and disappear. You can also use pistols here if necessary, but Lara will probably lose some health in the process. In any case, try to injure him and then get behind him as quickly as possible. If you block his route to the exit, he’ll keep shooting at Lara.
Try not to fall through the openings in the grating floor. If you do, you won’t be able to climb out again and you’ll have to swim through the underwater tunnels to get out of the room below and then climb up to the entrance again. And don’t pull the switch yet. It floods the cistern, and you still need to do a few things above water.
(NOTE: If you are coming to this walkthrough after flooding the cistern too soon, just pull this switch again to lower the water level, go on about your business and re-flood the area again when you’re ready. Others might want to do this just for fun to see the interesting effect of the floating crocodile corpses. They rise with the water but forget to sink when it recedes again. I had fun making Lara stand beneath one and wear its as a hat.)
Climb on the block in the near right (southwest) corner. Turn around and take a standing jump to grab the raised arch near the middle of the room. Pull up and, from there, take a running jump to grab the next higher ledge. Pull up and collect a large medipak and some shotgun shells.
Take a standing jump, not a running jump, down to the previous ledge. Jump over to the next ledge and then climb into the inverted arch above. Pick up the small medipak, go to the top of the low ramp on the right and climb into the barely visible opening above on the left. This is SECRET #1. Climb up three blocks to find more shotgun shells. Step off the edge onto the slope below. Slide forward and, just before the end of the slope, jump to grab the ledge ahead. Pull up, pick up 2 more boxes of shells, then slide down the chute into the room below.
Climb over the low wall to the other side of the room. Before jumping into the water, get rid of the 2 rats lurking below. To do this, jump over the hole in the grating floor to activate the rats. Then shoot them through the opening in the grating. (You may need to jump over the opening again a few times to attract them.) Then jump in and swim through the tunnel in the southeast corner. Follow this underwater tunnel through a few twists and turns to a room where you can surface. Quickly swim to the far corner of the room, climb out at the foot of the steps and kill another swimming rat.
Go to the top of the stairs. Take a running jump to grab the gray block opposite. Pull up, then take another running jump to grab the ledge where you’ll find the first RUSTY KEY.
Walk through the doorway ahead to the edge of a pit with 2 rats in it. Shoot them from above. Then turn around, drop and hang from the doorsill, traverse along the crevice to the left and drop to the floor. (It’s not far to traverse; you just don’t want to drop into the pit or Lara will lose health from the fall.) Cross the room and slide down the ramp to emerge back in the main room. (There’s another save crystal here.)
Once on the ledge outside, turn left and take a standing jump to grab the elevated walkway; pull up. From there, climb to the top of the long, L-shaped ledge and follow it around the southeast corner (toward the doorway where you entered this area). At the end of the ledge pick up the second RUSTY KEY. Drop down onto the ledge with steps where you killed a rat earlier. Go to the end and jump back to the ledge near the entrance. Walk to the end and jump across to the short elevated walkway ahead. Turn left (west) and take a running jump to grab to the ledge in front of the first locked door. Pull up and use one of the RUSTY KEYS to unlock the door.
Two gorillas wait in the side alcoves toward the back. Advance and draw them out, then back up shooting. Or, enter, turn around, climb up on the ledge above the door and kill them from there.
From the ledge above the door, take a running jump to the next higher ledge. At this point, Pierre reappears in the room below. You can either shoot it out from up here or drop down and try and chase him out. If you shoot at him a little and then duck behind something so he can’t see Lara, he should run off. If you’re having difficulty here, try this strategy: First, position Lara on the ledge directly above the entrance. Draw magnums. (You won’t need much ammo, but this method depends on the more powerful guns.) Take running jump to the next ledge, which will cause Pierre to appear. Roll as you land so Lara falls off the ledge and lands facing Pierre and the room’s entrance. Start shooting as Lara is falling and continue shooting as you run past Pierre and out into the MAIN ROOM. This should do enough damage that he’ll disappear while Lara is outside.
If you’ve dropped down, return to the second ledge. From there take a running jump to grab the third, where you’ll find a large medipak. Take another running jump to grab the fourth and highest ledge. Pull up and walk towards the edge. Turn around so Lara’s back is to the alcove with the magnum clips below. Walk backwards to the edge. Then walk one step forward. Backflip and Lara will land on the ledge. Or, walk to the edge facing forward, walk one step back, and swan dive onto the ledge (Walk + Jump + Forward). Pick up the clips. (NOTE: If you didn’t find the MAGNUMS earlier, you’ll get them now instead of the clips. In my opinion, this should count as a secret.)
Now use a running jump and grab to get back to the highest ledge. Turn around and this time take a running jump to grab the narrow crevice above the alcove where you got the clips. Traverse to the right until you can drop down safely. Follow the passageway, hop down onto the gray ledge, then go down and around to the left, sliding down until you’re on the flat spot above the final short slide.
Kill the crocodile from above. Slide down to the floor and either use the shotgun to deal with the second crocodile or jump or climb onto the block in the far left corner to shoot it from safety. (and get another save crystal). A third croc lurks in the passageway behind the slides. Go in on the right side and back out shooting. When it’s dead, go all the way into the passageway, kill a rat and pick up a large medipak.
Return to the croc room, climb up the two blocks in the corner, turn around and take a standing jump to grab the small ledge in the middle of the room. Pull up and take a running jump to grab the corner ledge. Turn right and take a running jump to the next ledge. Run off the end of the ledge to land on the ledge below without losing health. Now turn to face the crevice in the wall. Grab it and traverse to the left until you can pull up into the doorway.
Throw the switch to open the door. Enter cautiously—there are spikes and a couple of rats below. One rat won’t come out until you drop down, so kill the first one from above, jump diagonally to the left to clear the spikes, and then kill the other rat. Continue to an opening in the floor.
(NOTE: If this opening is filled with water, then you’ve flooded the cistern too soon. See the footnote below for details.)
Drop down onto a block in a mossy room. Kill the rat below. Hop down, enter the next room and kill another rat. Do not fall or jump into the pool. You won’t be able to climb out and will have to swim back to the main room (as described in the second footnote below).
Climb the stairs to the right of the metal door. Climb onto the ledge ahead and then to the higher ledge on the right. Go to the end of this ledge, turn right and take a running jump to the ledge below. Pull up onto the next ledge, turn right and take a running jump to the ledge beyond. From there, it’s a standing jump into the alcove with the switch. Use it to open the door below.
Climb down and take the first SILVER KEY. Immediately roll and draw your shotgun for another confrontation with Pierre. To get through this confrontation with little or no health loss, quickly position Lara in the far corner of the alcove on the right, facing out into the room. Pierre will approach from the other side of the room, and she’ll remain under cover until he’s right in front of her. As soon as he steps into view, blast him twice with the shotgun and he’ll run off. When he’s gone, jump into the pool and swim through the underwater passage to the next room where you can surface.
High up on the ledges are a couple of rats. You’ll be back in a bit, but to make your job easier then, you can kill one or both of these guys now: Climb onto the low block in the corner and jump up and down with pistols drawn until you get a lock on it. Keep jumping and firing until it’s dead. (Note the location of the high lever and the small door with the other SILVER KEY behind it. You’ll return here soon.) Now jump back in the pool and follow the other, twisty passage (to the south) back to the pool in the main area.
If you haven’t killed those crocodiles yet, climb out of the water quickly and do it. If you have, keep swimming to pick up SECRET #2: Swim into either of the openings on the west side. They connect in a U shape. In the middle of the underwater tunnel, in a shallow depression, is a set of magnum clips.
Climb out of the pool at the base of the ramp (on the east side between the two gargoyles). Climb/jump up to the walkway above, and from there back onto the balcony (on the east side) and into the ROOM WITH METAL GRATING AND CISTERN SWITCH. Now pull that switch to flood the area.
Return outside and swim down to the north end of what was the pool, through the small opening where you came out earlier. Follow the passageway until you can surface. Climb out of the water and kill the 2 rats if you didn’t do so the first time you came through. Pick up a small medipak (and a save crystal in the PS1 game) on one ledge, a large medipak and shotgun shells on the other. (NOTE: If you don’t already have the SHOTGUN, you’ll find it here in place of the shells.)
Jump back in the water and pull the lever to open the door below. Swim down, pick up the second SILVER KEY and the exit door opens automatically. Swim back to the surface. Climb out of the water on the ledge near the right door of the two that look alike (on the west wall).
Unlock the door with the second RUSTY KEY. Jump in the water and swim down through the spikes. (They’re safe now that you’re in the water.) Take a left at the spikes, then swim down into a little room and turn around. There’s an opening ahead and to the left. Go through it, pick up a small medipak and the GOLD KEY then exit.
When you take the key, the door ahead opens and another crocodile appears in the underwater tunnel to the right. Quickly swim through the door and out into the MAIN ROOM. Climb out on the nearest ledge and kill the croc. Then head for the ornate balcony (on the north side).
Climb up but before entering find the movable block to the left of the entrance. Push it once and enter the room behind, which is SECRET #3. Stand underneath the balcony with Lara’s back toward the slope. Step back to make sure she’s as close to the base of the slope as possible. Backflip onto the slope and then hold Jump and Action to spring forward off the slope and grab the edge of the balcony. Pull up and get 2 sets of magnum clips and a large medipak.
Return outside to the locked doors and use the 2 SILVER KEYS to unlock them. Go in and climb on the square pillar on the right. (In the PlayStation game, there’s another save crystal here.) Turn around and take a standing jump to grab the ledge above the door. Pull up. Take a running jump to the ledge with the gold keyhole. Immediately safety drop to the floor to get out of the way of the angry gorilla. Climb back to the ledge above the door and kill the ape from there. Jump back across and use the GOLD KEY to unlock the door below. Don’t drop down until you’ve killed the 2 lions that emerge. (You can dangle Lara from the ledge to get their attention and/or jump back to the other ledge or down to the square pillar to get a better shot if necessary.)
When the coast is clear enter the next room. Advance cautiously. The checkerboard floor has a number of broken tiles, some with spikes beneath. The far left break-away tile conceals a small medipak, so be sure to drop in and pick it up. At the rear is a switch. It opens the door to the right releasing 3 lions. You can pull the switch, hop back and then jump onto the block above the switch. The lions can’t reach Lara there. Or, don’t pull the switch and wait to shoot the lions from above in a little while. Or, you can ignore the lions altogether, since there’s no reward in that room.
Go around to the right of the switch and find the movable block. Pull it twice. (The level exit is behind it, but don’t leave yet.) Go around to the side and pull the block out into the room. When you can’t pull any further, go around the back and push it once more. Now you can use it to climb up to the balcony.
If you want all the kills, run up the angled block on the right and hop down behind it to trigger the appearance of 2 rats. Kill them. Then pick up the large medipak and 2 sets of magnum clips at the other end of the balcony. If you didn’t kill the 3 lions earlier, you can snipe at them from the well-lit doorway. Drop down either into the lion room or onto the block you moved. There’s a switch in one corner of the lion room that opens and closes the door.
To finish the level, go to the opening where the movable block was and fall down the long shaft.