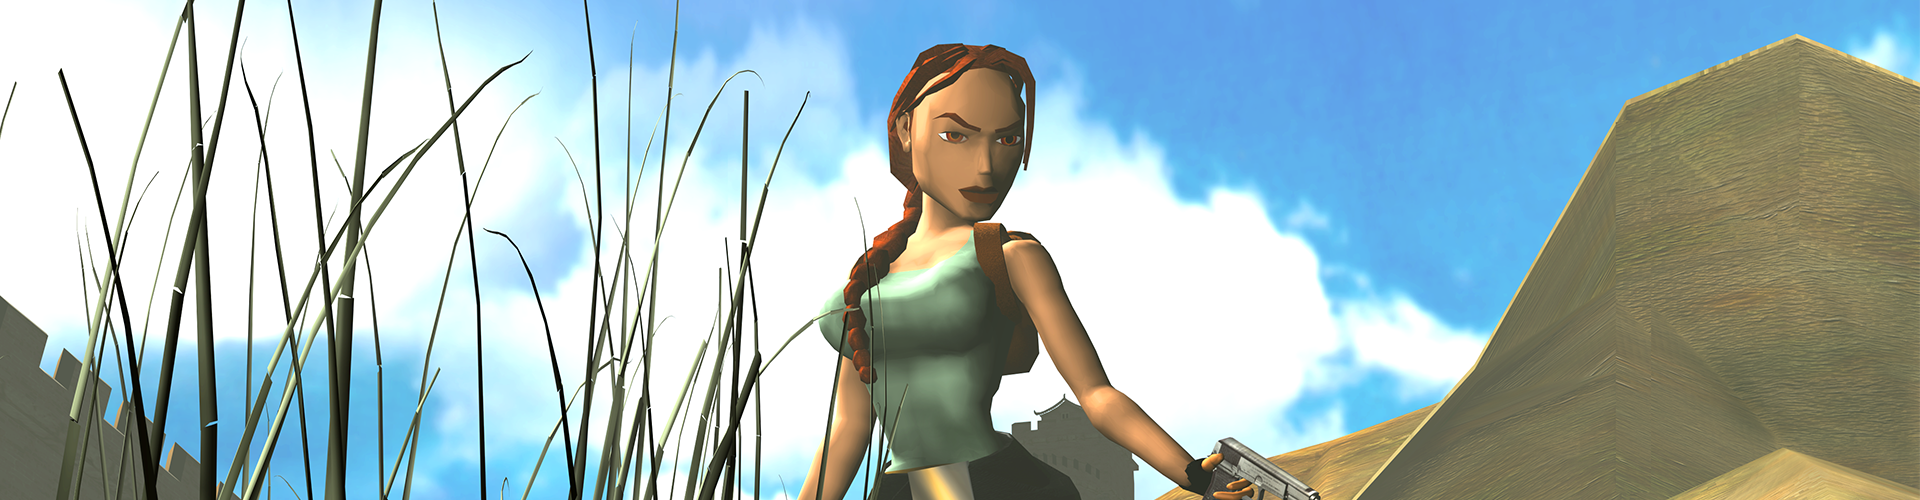

This is the walkthrough and video walkthrough for Tomb Raider 2 Gold: Golden Mask. Find all the secrets and puzzle solving below. The video walkthrough was extracted from Youtube thanks to Tartancroft and the text walkthrough thanks to Stella.
1. The Cold War | 2. Fool’s Gold | 3. Furnace of the Gods | 4. Kingdom | Bonus: Nightmare in Vegas
1. The Cold War
ICY POOL: The level begins with a long drop into cold water. There’s a great white shark in the pool. So you’ll probably want to head for dry land immediately. To get to shore, swim forward and around to the right, toward the snowy ledge at the left side of the cave opening. When you round the corner just before that ledge, you’ll hear dramatic music as the shark moves in. Quickly swim around to the side of the ledge nearest the cave opening, where the edge is low enough to reach, and pull up out of the water. Now shoot the shark from above. Grab the flares lying at Lara’s feet. There’s also a snow leopard prowling around in the cave. If you like, you can take care of it now from the safety of the ledge where the flares were.
Alternately, from the starting position where you first drop into the pool, turn around and swim straight down. You’ll find some harpoons on the bottom. Continue forward along the bottom then to the right, picking up 2 more bundles of harpoons as you go. The HARPOON GUN is sitting on a sunken box in the corner. Once you have it, you can swim back toward the cave and take on the shark.
Once the shark is belly-up, retrieve the HARPOON GUN and harpoons if you didn’t get them at first. There are also 2 more bunches of harpoons on the bottom of the pool between two of the ice hills. After picking up the last set of harpoons, surface and turn so Lara’s back is toward the cave opening. You’ll see two barrels on the bottom of the pool ahead. Swim down past them and around to the left to find a small, rectangular opening in the ice wall containing SECRET #1, the gold coins. Grab the treasure and return to the surface.
Again, climb out of the pool onto the small, angled ledge on the left side of the cave opening. Get the flares and shoot the leopard in the cave if you didn’t do so earlier. Then hop over to the area where the leopard fell. (screenshot)
LEOPARD CAVE: Just inside the cave is a slope with 2 boxes of shotgun shells. You can pick up the first box without any trouble. But when you take the second box, a huge snowball rolls down from the right. Backflip out of the way to avoid it. On the left is a movable crate. Push it once to find a small medipak underneath. Pick it up and then turn around.
Draw weapons and step forward through the opening on the right, next to the one where the snowball originated. Another leopard will charge, but you should be able to see it coming and hop back while shooting. There are more shotgun shells at the rear of this cave. Grab them. Then turn around and head straight back the way you came. As soon as you move from rocky ground onto a snowy patch, turn right and you’ll see another box of shells in the distance. (Ignore the flares on the left for now.) As you approach the shotgun shells, another leopard charges toward you. Kill it. Then run forward and pick up the shells. Roll and head back the way you came.
At the base of the small slope, turn right and pick up the flares lying on the ground. Then immediately side flip to the left to avoid another rolling snowball. Hop back down to the spot where you found the flares and walk forward toward where the snowball came from. This triggers another rolling snowball, but as long as you stay to the left it will pass by harmlessly on Lara’s right.
Turn right (so the snowballs are now on Lara’s right). You’ll see 2 small openings in the cave wall. Draw weapons and step through the opening on the right. Immediately turn left and shoot another charging leopard. Then pick up some shotgun shells in the dark alcove ahead.
Return to the snowy slope where the last 2 snowballs originated and start up the hill. The pit ahead isn’t deep; you can jump across it or stay to the left to walk around it. On the other side of the pit, keep left as you continue toward the top. Quickly move past the snowy alcove on the left to avoid 2 clusters of snowballs coming in from ahead and from the right. Just up the slope on the left you’ll find more shotgun shells. Turn around, come back down the slope a bit, and then turn left into the opening opposite the alcove where the snowballs landed. Go to the back of this cave and climb the ice ladder to the top.
MINE COMPOUND FIRST AREA: At the top of the ladder there’s a large medipak. When you approach it a door at the top of the room opens and a goon in a white suit enters and makes his way down toward you. Take him out as he approaches. Then climb into the opening above where you found the medipak. From here you should be able to shoot the mercenary in the orange parka at the top of the room without him returning fire. Don’t forget to search the bodies for 2 sets of M16 clips.
Go through the door at the top of the room, where the mercenaries came in, and take a standing jump over the snowbank at its lowest point. Grab the movable crate on the right. Pull it once, go around or over it and push it once from the other side. Behind it is another movable crate. Pull this crate once and then climb over it to find a little cave containing a small medipak and shotgun shells.
ZIP LINE: Return to the first crate you moved in this area and climb the ice column next to it. Walk forward underneath the zip line to the edge of the cliff for a nice view and a pack of flares. Turn around and head back toward the opening where you climbed up from the caves. Ahead on the left is a small medipak sitting on a rock. Grab it and then climb up to the zip line handle. If you stand here for a little while, an eagle will fly up from the chasm. Shoot it to avoid tangling with it later on.
Use the Action key to grab and hold the zip line handle. Ride it down across the deep chasm. Let go just before the end to land on the icy slope and slide safely into a shallow trench.
FAR SIDE OF CHASM: Kill 2 more eagles (plus a third if you didn’t meet the one at the top of the zip line). Follow the trench toward the building. A leopard patrols the raised path to the right. While standing in the trench, get a lock on it with your pistols and jump up and down while firing to kill it without taking any damage. Or, climb onto the icy ledge near the ice window and shoot the leopard from there.
NOTE: There is a series of rooms on the other side of the window, but you’ll need a key to open one of the doors in that area. I recommend waiting until after you’ve obtained the key to explore there.
From the icy ledge in front of the window, turn to face out over the trench where you killed the eagles. Just ahead on the right is a flat ledge in the ice wall that you can jump to. Ahead is another trench that runs along behind the ice wall parallel to the first trench. This is also a snowball hazard. Hop down and turn left but walk forward slowly. As soon as Lara steps on the second floor tile on this path, the snowball will start to roll from above and behind. Immediately hop back, and it will sail overhead. (Or, if you’re having trouble hopping back in time, backflip instead. Lara will take a little damage but should come through OK.) Follow the rolling snowball down the trench. In the pit beyond the zip line you’ll find the M16 ASSAULT RIFLE.
Climb out of the pit, return to the top of the path, climb back over the ice wall on the right, and slide down into the trench where you killed the eagles a little while ago.
DESCENDING TO THE BOTTOM OF THE CHASM: Follow the trench away from the building. At the end, turn left and take a standing jump up onto a flat spot with some shotgun shells. Turn slightly to the left and jump into the depression ahead. Climb onto the ice block ahead on the left. (You can also get here by walking up the path alongside the building where the leopard was.) Just ahead on the other side of the low hill of ice is the deep chasm you zipped over earlier. Step down onto the small ledge at the rim of the chasm. Then turn around, drop and hang from the ledge, and climb the ice ladder to the bottom. Follow the long tunnel, killing a leopard along the way. At the end of the tunnel, climb onto a ledge where you’ll find SECRET #2, the gold bars, plus 3 boxes of shotgun shells.
Backtrack down the long passageway and climb the ice ladder to the top.
NOTE: You can also drop down through the opening with the wood sides, just in front of the spot where the gold bars were, but you’ll end up all the way back in the LEOPARD CAVE, at the top of the slope where the 2 rolling snowballs originated. Head down the slope and turn left into the cave with the first ice ladder. Climb back to the top, go through the room where you killed the 2 mercenaries. Then climb back up to the zip line and ride it down again.
BUILDING COMPLEX/GUARD ROOM KEY: At the top of the ice ladder leading out of the chasm, vault up onto the ledge straight ahead, go forward over the low rise, then turn right and approach the building. Turn right again and follow the snowy path that runs along next to the building. At the upper end of this path, hop down, turn left and enter a room with one wall made of bars. Another guy in white approaches from the right. Kill him and take his M16 clips. (You’ll also see a small medipak on the other side of the bars, but you can’t get it yet.)
At the far end of this series of rooms, behind some overturned barrels, you’ll find the GUARDROOM KEY. Take it and return to the lower end of the room, where you came in. Pull the switch in the barred alcove to open the door on the other side of the bars. Another orange-jacketed mercenary comes through that door, but he’s not smart enough to shoot through the bars. So you’re safe for now.
Roll so the switch is behind Lara and go forward along the icy path where you dropped into this area. Climb up on the right—not straight ahead or you’ll fall into the chasm. Follow the path alongside the building to the end. Turn right and shoot out the ice window with your pistols. Step inside and use the key you just found in the lock. This opens the GUARD ROOM door.
GUARD ROOM: Enter and kill the orange-jacketed mercenary you let in earlier. Pick up automatic pistol clips and shotgun shells from the floor of the GUARD ROOM.
For now, ignore the door where the mercenary came in and return through the door you just unlocked. Straight ahead in the rocky cave is a movable crate. Push it once to open up a dark, snowy passageway to the right. Take a standing jump up the slope, then a running jump across the deep pit to grab the opposite edge. Pull up and continue forward. Climb onto the step, turn right, jump over the icy slope, and slide down the other side into a depression. Here on the ground you’ll find the AUTOMATIC PISTOLS. Climb up into the building through the doorway at the top of the slope opposite the one you just slid down.
You’ll find yourself in a small, low-ceilinged room with barred windows. Take the automatic pistol clips from the ledge on the left and exit through the other doorway. Cross the snowy area between the buildings and enter the cave ahead on the right. (This is the same cave with the 2 ice windows and wooden crate that you explored a few minutes ago.) Turn left into the GUARD ROOM. Go through and out the other side. Then follow the walkway to the top to find the small medipak you saw earlier through the bars.
SECOND CHASM WITH TWO RAMPS: Turn around and backtrack about halfway down this walkway. On the right is a snowy ledge that dips down in the middle. Step up onto this ledge for a panoramic view of the chasm below and a little sniper action. There are 2 mercenaries below, one on the left and one on the right end of the chasm. Go for the one on the left first. It may take a little while, since he runs in and out of the cave. Get a lock on him with the pistols or M16 and hold the Fire button. When he falls, walk up the snowy ledge toward the right end. From there, you should be able to kill the guy in white down below.
NOTE: You may also be able to target a third mercenary on the roof of the building above the white-suited guy .If not, don’t worry; you’ll have another chance shortly.
Now return to the lowest part of the snowy ledge. Look down and you’ll see a short, white slope sticking out of the cliff wall. Stand directly above this slope, step off the edge and slide down to land safely on the long ramp coming out of the cave. Shoot the eagle that soars in from above. If you like, you can also shoot that third mercenary on the roof on the far side of the chasm. You’ll need the M16 to target him from afar. Or, wait and deal with him later.
Alternately, instead of shooting the mercenaries from above, slide down the chasm wall onto the ramp, as described above. Shoot the guy in the orange parka in the cave, then the eagle, then the guy in white on the other side of the gap. You should be able to target him with pistols. Switch to the M16 and take out the guy on the roof above where the white-suited guy fell.
Then enter the cave with shotgun ready. A leopard springs out as you approach. Two well-placed shots will bring it down. If you prefer to use pistols, just take care not to jump around so much that you accidentally fall into the chasm. Pick up M16 clips from the fallen mercenary and a small medipak lying in the back right corner of the cave. Pull the switch at the back left to open a door on the other side of the chasm.
You’ll also find the SnoCat parked in a side room off the main cave. If you want all the kills and pick-ups, leave the snowmobile for now. If you don’t care about getting everything, skip the next paragraph.
Return to the mouth of the cave and step down onto the small ledge to the left of the long ramp. There’s another leopard at the bottom of the chasm. Shoot it with pistols from above. Then turn around, drop and hang from the edge and climb down the long ice ladder to the bottom to find shotgun shells and flares. Climb back up the ladder to the cave.
JUMPING ACROSS THE CHASM: Go into the cave on the left, approach the side of the SnoCat and press Action to get on. Use direction keys or the left analog stick to steer the snowmobile out of the side room. Position it squarely facing the ramp jutting out into the chasm. Race forward, holding Action for a turbo boost, to jump across the gap and land on the opposite ramp. If you didn’t kill the white-suited mercenary earlier, you can run over him now. Dismount and pick up his M16 clips. If you didn’t take care of the guy on the roof, walk out to the end of the ramp to target him from below. But again don’t worry if you can’t kill him yet. You’ll get closer to him later.
OPEN AREA WITH THREE WOODEN BLOCKS: Exit on foot through the wooden door you opened earlier using the switch in the cave. Climb onto the nearest raised wooden block and await the arrival of a goon on a snowmobile with mounted guns. Stay on top of the block, so he can’t run Lara over, and use the automatic pistols or M16 to take him out quickly. Pick up the M16 clips on top of the first block, automatic pistol clips on a snow ledge to the right of the door where you came in, and more M16 clips and a large medipak on the third block.
Take either snowmobile—the black-and-white one has the turbo feature and the red one has guns—and drive through the doorway opposite the third wooden block. Drive up through the building, stopping when you emerge outdoors at the top. Be careful not to drive off the edges on the left or straight ahead. If you didn’t kill the mercenary here earlier from below, do that now, and take his automatic pistol clips.
SNOWMOBILE AREA WITH ICY WINDOWS: Drive the snowmobile along the ledge, across the small gap above the chasm, up the slope and through the three windows.
In the open area beyond the windows, there’s a single window straight ahead, a wall of ice on the right, and a wide opening on the left. If you took the red snowmobile, you could ride into the area straight ahead and take on another armed snowmobiler. Here I’d recommend driving through one of the openings on either side and not through the window. Unless you break through the window going perfectly straight, you’re likely to crash. Also, once you enter the area with the snowmobiler, don’t drive through the next set of windows. The drop-off on the other side is a killer.
If you took the black-and-white SnoCat or just prefer to go on foot, dismount and climb into the opening without windows on the left. Soon the snowmobiler will ride in and you can shoot him from here. If you take a step or two back from the edge, he’ll have a harder time shooting Lara.
FROZEN POOL AND SHACK: Beyond the opening on the left side of the SNOWMOBILE AREA there’s a frozen pool with a little shack. Find the switch in the dark corner on the left. Pull it to cause an avalanche that breaks the ice on the surface of the pool. This also alerts the mercenary inside the shack, who comes out to investigate. Kill him and take his small medipak and M16 clips.
Go into the shack and pull the switch. The camera shifts to show a closed wooden door at the top of a slope. This actually indicates that the wall of ice previously blocking this slope, back in the SNOWMOBILE AREA, has been shattered.
NOTE: The closed metal door near the switch you just pulled will open later. Ignore it and the area with the slope and wooden door for now.
Exit the shack, turn right, and jump into the deep end of the pool. Swim down and follow the underwater passageway. When you come to the cement opening with the Soviet hammer and sickle symbol, check your air supply. If necessary, you can swim straight up on the left side of the passage to an air pocket. Otherwise, continue through the square opening in the cement wall, then onward and upward to surface in an icy pool.
NOTE: There are some items on a high shelf at the back of this dark cave. You can’t reach them yet, but make a mental note of them. You’ll return here shortly.
ICE CAVERN: Wade out of the water and head toward the far side of the cave. Don’t worry; the ice floor is safe to stand on. Ahead is a large medipak up on a tall pillar of ice. There are at least two different ways to reach it. The easiest is to position Lara with her chest against the pillar and her back toward the snowy slope on the left. Then backflip onto the slope, quickly jump and grab the edge of the pillar, and then pull up.
Alternately, after wading out of the pool, move into the middle of the room until Lara is standing beneath the elevated walkway made of ice. Turn left here, go between the two hills of ice and climb onto the snowy ledge straight ahead. Make a U-turn to the left and climb onto the ledge that is level with the beginning of the ice walkway. Turn left and take a running jump across the fragile ice tiles to land on the top of the angled pillar straight ahead. Turn right and run off the edge of the pillar onto the next ice walkway. Keep running forward as the ice collapses under Lara’s weight. The column at the corner of the walkway is solid, so you can pause there if you like. Then turn left and run across the last section of ice tiles to the medipak.
When you climb up to the ice walkway, a transparent human figure appears on the block above the medipak. You can see more of them roaming around beneath the floor. These ice men, described as “restless spirits” by the level designers, are allies so don’t harm them. Like the monks in the Barkhang Monastery in TR2, they won’t attack Lara unless she shoots first. They’ll even help her fight enemies. As you explore this area, save frequently in new slots. Then if you do accidentally shoot an ice man, you can reload and continue.
NOTE: Naturally, if you insist on getting all the kills and don’t care about harming benevolent spirit beings, you can fight the ice men instead. There 4 in all: one on the pillar with the medipak and 3 more below. They are tough opponents in close combat, but you can take them out easily with pistols from a safe distance. Shoot the first from the solid column halfway along the ice walkway and the others later from the ledges alongside the ice ramp on the other side of the cavern.
CLIMBING DOWN TO THE ICE CAVERN FLOOR: When you pick up the large medipak on the tall ice block, two giant snowballs crash through the floor, opening up the lower area of the cavern. For whatever reason (wind chill. . . magic?) this also causes the pool where you entered to freeze over so you can reach those goodies. There are several ways to get back to the other side of the cavern:
First, if you didn’t already break the ice tiles, you can take that route. It’s a lot more exciting now with the hundred-foot drop! First run straight from the pillar where you found the medipak to the corner block, which is solid. Then turn right and run across the next section of ice tiles. As you cross the third tile, veer to the left and jump toward the shorter, perpendicular walkway, in order to land on the solid snowbank below it. From there, move forward toward the cavern wall, turn left and make your way counterclockwise along the wall of the cavern. This will lead you back to the pool.
Or, from the pillar where you found the large medipak, turn so the open cavern is on Lara’s left and take a running jump to the snowy ledge ahead. Go around the mound of clear ice on either side. Then make your way counterclockwise along the wall of the cavern. This will lead you back to the pool.
Cross over the frozen surface of the pool and climb onto the ledge to get some Uzi clips and grenades. Cross back over the frozen pool and slide down the slope of bluish ice to the bottom of the cavern.
There are 3 more ice men here. Pay attention and they’ll lead you to points of interest. SECRET #3, the gold skull, is behind some panes of ice near the middle of the cavern. Shoot the ice to get at it. When you pick up the skull, 3 mercenaries appear near the base of the ice slide. The ice men will help you fight them as long as you don’t accidentally shoot any of the good guys. Once the mercenaries are history, search their bodies for shotgun shells, 2 sets of Uzi clips and a small medipak.
CLIMBING OUT OF THE ICE CAVERN: In the corner of the cavern nearest the base of the ice slide there are two square ice windows. Shoot out the one on the right. (The other is unbreakable.) As you start up this long tunnel, a leopard will charge, but you should have plenty of time to bring it down before it gets to Lara. Just be careful not to shoot the ice men patrolling here by mistake. If necessary, you can run back out of the tunnel and climb onto the ledge on the left. The big cat can’t reach Lara here and she can shoot it when there are no ice men around.
Continue up the long tunnel to the top. Turn right into a small alcove with ice ladders straight ahead and on the right. Climb the ladder on the right and pull up into a small, dark hallway. The door on the left opens as you approach. Go through into the SHACK where you were before.
If you didn’t do so earlier, pull the switch inside the shack to break the wall of ice on the far side of the SNOWMOBILE AREA. Exit the shack, cross the pool and climb through the raised opening.
SNOWMOBILE AREA (again): Continue straight across the open area to the ramp that was previously concealed behind the ice wall. There are 2 bad guys here: one in orange on the ledge on the right and one in white up on the left. Run up the slope just far enough to get their attention. Then run or backflip down the hill. Use the left side of the big cement archway for cover as you shoot the guy on the right. Afterward, move in along the left side of the opening, turn to face the ledge where the white-suited guy is standing and jump up and down while firing until he falls. Climb up and take their stuff: automatic pistol clips from the guy on the left and M16 clips from the one on the right, plus some flares on a wooden block partway up the slope.
INTO THE PIT FOR THE UZIS: Before opening the wooden gate and moving on, take a little detour for some goodies. Climb up to the wooden ledge on the left side of the slope, where the white-suited mercenary fell. If you look over the edge into the deep pit, you’ll spot some shiny goodies in the darkness. That’s where you’re headed.
You’ll need to line up this next jump carefully.
Hold the Walk button as you maneuver Lara into position. Move to the right side of the wooden ledge, turn so the pit is on Lara’s left and she’s facing the snowbank. Then step forward toward the snowbank and left toward the pit as far you can. Take one step back from the snowbank. Pivot just slightly to the left so Lara is facing out past the left edge of the snowbank. Release the Walk button and hop back just once to set up the next jump.
Make sure Lara has full health, light a flare and save your game before continuing. Now take that running jump, and hold the Right direction key or press to the right on the control stick while Lara is in the air, so she veers around the pointy-peaked snowbank and lands on the slope just beyond it facing uphill. Hold Action as she slides back to grab the edge. Let go, slide and grab the edge of the second icy slope below. Now traverse to the right into the V where the two adjacent slopes meet. This spot is slightly lower than the rest of the ice wall. So as long as you start with full health, you can let go and drop into the pit without dying. Pick up Uzi clips, a large medipak and the UZIS!
Climb the ice ladder near where the Uzis were lying and you’ll emerge back at the SNOWMOBILE AREA. The window you just climbed through solidifies behind Lara so you can’t go back down the ladder. Turn left, go over the rise and down the other side. Then turn left again to get back to the slope with the wooden door at the top.
NOTE: While not technically a “Secret,” the UZIS are very well hidden. If you miss them or can’t manage this sequence, you will have another chance to get the guns in the next level. Special thanks to Bill V. for this method of dropping into the pit, and to Ralph Black and Stiletto for the two methods originally included here and now listed in the footnote.
CONTINUING TO THE END OF THE LEVEL: The switch that opens the wooden gate at the top of the slope is located in the corner above and to the left of the cement archway when facing it. Pull the switch and then advance slowly up the slope with guns drawn. This should allow you to target the white-suited enemy beyond the gate before he spots Lara. If he does start shooting back, just side flip from left to right while firing through the doorway. When he’s dead, go through and take the small medipak he dropped.
If you like, you can go back down the hill for one of the snowmobiles, but it’s possible to continue on foot. Run or drive up the ramp past where the last white-suited mercenary fell. If you’re driving, accelerate to jump the shallow pit just beyond the crest of the hill. You’ll land on the other side near a wooden block. Or, if you’re on foot, climb onto the stone wall on the left side of the ramp and jump to the top of the steep slope. Then jump across the pit.
The next area, with the wooden walls and the snowy slope leading down to the right, is also a snowball trap. Whether you’re walking or driving, stay in the middle of the slope and head for the small doorway at the bottom, and the rolling snow will miss you.
As you continue forward through the dark tunnel, another mercenary in white steps into your path. Shoot him or run him over. Then take his automatic pistol clips and the large medipak lying on the ground. When you pick up the medipak, another mercenary approaches from the snowball trap area. Dispatch him and take some grenades and the SHAFT B KEY off the body.
Continue along the tunnel until you come to a wooden door with a keyhole. It’s on the right just before the tunnel ends. Use the SHAFT B KEY to unlock this door. (You’ll open the metal door at the end of the tunnel shortly.) Enter carefully; there’s a leopard just inside. I recommend vaulting up into the doorway and immediately hopping back into the tunnel to shoot, rather than running out onto the walkway. If you accidentally fall, it’s not a long drop, but it puts you way back at the GUARD ROOM area.
SHAFT B/EXIT: Cross the elevated walkway to the room beyond. Admire the view, then pull the switch to open the metal door you saw earlier. Return across the walkway, re-enter the tunnel and turn right to get back to the metal door. Step inside and then hop back shooting as another angry merc emerges. He’s carrying a pair of grenades.
Go through the metal door and into the room on the left. There’s a box of shotgun shells on a table, but before you pick it up, take care of the 2 enemies in the doorway on the left. When it’s safe, take the shells from the table and relieve the mercenaries of a small medipak and more shotgun shells.
When you step outside through the doorway where the mercenaries came in, an eagle flies in from above. Shoot it down and continue forward between the angled metal duct on the left and the covered structure in the middle of the open area. There is a sniper on top of the high walkway ahead. You can barely see him against the darkening sky, but if you draw pistols as you approach the corner of the covered structure, Lara will target him. Then you can step out just far enough to shoot him or use the corner for cover if necessary.
When he falls, go into the covered structure and pull the switch to open the nearby trapdoor. Approaching the switch also triggers the appearance of a second sniper on the catwalk. Deal with him as you did the other. Or, if you’re not interested in getting all the kills, ignore both snipers and just pull the switch and run to the trapdoor.
Drop through the open trapdoor into an icy pool. Surface and swim through the large wooden opening. Approach the ice man on the ledge to end the level.
NOTE:If you must have all the kills, don’t get too close to the ice man at first or the level will end before you can shoot him. Instead swim to either side of the tunnel where the floor slopes upward and Lara can stand. Draw pistols and shoot the ice man. Then continue forward.