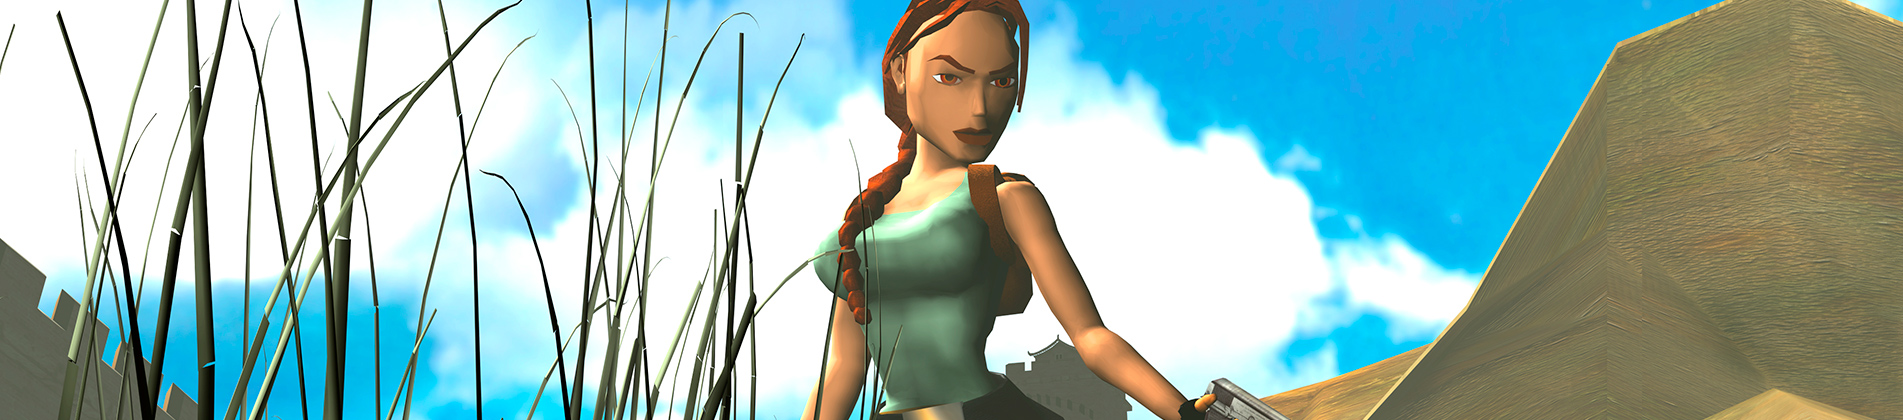
Tomb Raider II Gold Walkthrough
This is the walkthrough and video walkthrough for Tomb Raider 2 Gold: Golden Mask. Find all the secrets and puzzle solving below. The video walkthrough was extracted from Youtube thanks to Tartancroft and the text walkthrough thanks to Stella.
1. The Cold War | 2. Fool’s Gold | 3. Furnace of the Gods | 4. Kingdom | Bonus: Nightmare in Vegas
Bonus: Nightmare in Vegas
HOTEL ROOMS: Press the button to open the door and exit the bathroom. In the next room there’s another button on the left, which opens the closet. Inside are 4 boxes of shotgun shells, small and large medipaks and flares. The door opposite the bed also opens with button and leads to a balcony, which affords a view of the Vegas skyline. In the suite next door, you can see a couple of armed baddies pacing back and forth. Lara smells danger!
Back inside, grab the LOADED SHOTGUN and 2 boxes of shells from the windowsill to the right of the chaise lounge. Then, if you like, press the button below the TV showing the Elvis concert, and you’ll receive a mysterious vision of Winston blundering around in a bathroom somewhere. Now it’s Lara to the rescue!
The remaining door in Lara’s room opens automatically as you approach. Exit into a hallway and turn left. The doors at the far end are locked. Shoot out the window in the garish alcove and step out onto a tiny ledge. Walk to the right edge and take a standing jump to grab the top of the greenery-covered wall. Traverse to the left onto the trellis, then climb down, left, and up again onto a ledge outside the nasty neighbors’ window. This window is not breakable, but if one of the bad guys gets close enough, you may be able to shoot him through the glass.
Move to the end of this ledge and take a standing jump over to the balcony. Shoot out the glass, and take on those 2 masked goons. Relieve the bodies of a small medipak and shotgun shells, and pick up 3 more boxes of shells scattered around the room. Press the button in the corner to free the butler from the bathroom. Grab the small medipak from the dresser and the HOTEL KEY from the floor of the shower stall.
Exit the bad guys’ room through the door near the TV showing the underwater program. (The door opens automatically.) Turn left and use the key in the keyhole to open the double doors.
NOTE: If you don’t want Winston following you as you explore, lure him back into the bathroom, run out and press the button to shut him in just like you do in Croft Manor. 😉
ATRIUM WITH HUGE GOLDEN SCULPTURE – UPPER LEVEL: Here on the top level of this very tall room you’ll find, counter-clockwise from the entrance, a ZOO, a BROKEN ELEVATOR (it’s missing a part, which you’ll find shortly), a couple of empty alcoves, and a GLASSED-IN HALLWAY WITH GARISH CARPET (this room is barred by a gate at the moment).
BUG WARNING: It is possible to descend by safety-dropping from the walkway on the right side of the atrium onto one of the small, cement ledges below. However, doing this may cause a bug that will prevent you from finishing the level. To avoid this problem, just make sure you enter the ZOO before climbing down to the lower levels. Once you’ve done that, you can explore in any sequence you like. For details, see the footnote below.
There is no single correct order to cover this area. Here I present one possible route that includes all kills and pick-ups:
Starting in the doorway where you enter the ATRIUM from the hallway near the HOTEL ROOMS, turn right and follow the black-and-white tiled walkway about halfway across this side of the room. Turn left to face the huge, golden sculpture. Then take a running jump to grab the sculpture just below the large medipak. Climb up and take the medipak. Turn around and take a running jump back to the black-and-white walkway. Follow it around to the right and enter the ZOO.
ZOO WITH BIRD MONSTER CAGE: Inside on one of the raised, gray blocks to the left of the big cage are some flares. Climb up, grab them and shoot the thug who appears near the entrance. Then head for the back left corner of the room, where you’ll find some shotgun shells near the second snow leopard diorama. Return to the front of the room and climb the blocks on either side of the entrance to reach the rafters. Jump over to the top of the monster’s cage. In an alcove at the back you’ll find 2 boxes of shotgun shells and a small medipak. You can also see the gold skull inside the cage but you can’t reach it yet. For now, safety drop to the floor, losing a little bit of health in the process, or climb back down the ledges at the front of the room, taking no damage. Then go back out into the ATRIUM WITH THE HUGE SCULPTURE.
STUNT DIVING FOR UZIS: Move to the edge of the walkway overlooking the huge, golden sculpture. Now look waaaaayyy down. There’s a small, square trapdoor at the base of the sculpture. That’s where you’re headed. If it’ll make you feel better, light a flare and throw it down so you can see the opening. This is the perfect opportunity for a swan dive: While standing at the edge, hold the Walk button. Then press Forward and Jump to dive. Press Roll to add a couple of somersaults on the way down if you like. Or, just take a standing jump from the edge of the walkway. The trapdoor opens as you fall, and the room below is flooded, so Lara should land safely.
WARNING: Do not try hanging from the edge before you jump or dive. The trapdoor is triggered by Lara moving through the square directly in front of the spot from which you dive, and it only cycles once. So if Lara hangs from the edge and then pulls up, the trap door will open and close. Then when you attempt to dive, the door will remain closed and Lara will dive to her death.
The trapdoor closes behind Lara as she splashes down, but there’s a small air pocket just below the trapdoor where you can surface to breathe. Scattered around the floor are the UZIS and 4 sets of clips. When you have everything, swim along the narrow tiled passageway and through the small door with the ‘K’ on it, which opens as you approach. You’ll emerge in a SWIMMING POOL. Get air if necessary. Then retrieve the HOTEL KEY from the bottom of the pool. When you return to the surface, a thug is taking potshots at Lara from the other end of the pool. Quickly climb out of the water and kill him.
The double doors near the swimming pool won’t open until you replace the missing a CIRCUIT. So for now move out into the ATRIUM. Head for the area on the right, between the sculpture and the alcove decorated with jungle foliage. Roll and take out the 2 armed bad guys who appear near the SWIMMING POOL. Relieve them of a small medipak and 2 boxes of shotgun shells.
Now return to the alcove decorated with jungle foliage and use the HOTEL KEY in the lock to open the doors.
JUNGLE ROOM/TYRANNOSAURUS REX CAGE: Inside, two greenery-lined hallways lead away from the entrance. Follow the one on the right first. Move forward and shoot the armed thug who comes toward you. Grab 2 boxes of shotgun shells on the ground near the T. rex cage. Return to the entrance, turn right and follow the other hallway. Kill another armed thug and take his small medipak, plus more shotgun shells lying on the ground.
BLACK-AND-WHITE “CELL BLOCK ROCK” LOUNGE: Return to the ATRIUM WITH THE HUGE SCULPTURE, go to the right and enter the doorway framed with black-and-white tiles. Inside, press the 2 buttons in the alcoves decorated with blue bubbles. This raises the curtain on the stage. As you approach the stage, 4 club-wielding goons climb over the black-and-white blocks and attack. You can put some distance between Lara and them, but be careful not to back up too far. If you go all the way up the stairs, another bad guy enters and starts shooting. I prefer to wait and deal with him on the way out. Pick up shotgun shells from one of the club goons, plus a small medipak and flares lying on the floor.
Climb onto the stage and take the shotgun shells. This triggers the appearance of 2 more goons who emerge from behind the blocks. Take care of them. Then move to the right side of the stage and climb onto one of the blocks between the wall and the stacked blocks with the swinging block. (You could also climb up on the left side, where the blocks are arranged similarly.) Turn left and climb onto the next block. Pull up onto the next block at the right edge, so Lara doesn’t get clobbered by the swinging block above. Pivot slightly to the right and take a standing jump to the ledge along the back wall with the 2 boxes of shotgun shells. Grab them and safety-drop to the floor.
Along the base of the backstage wall are 2 movable blocks. Pull each of these twice toward the front of the stage, so they line up with the stationary blocks. Doing this opens the trapdoor behind the wall of blocks.
Drop through the opening into the room below, where there are several black-and-white movable blocks. On the lowest level, there’s an L-shaped open space in one corner, as well as another open square. Hop down into the L-shaped space. Pull the block in the corner once. Climb over it, turn right and pull the second block once. Climb over the second block and pick up the 2 sets of Uzi clips that were underneath. Then turn around and push the second block into the corner where the first block started. Turn around again, run forward, and grab the third block. Pull it out of the corner and climb over it to find SECRET #1, the gold coins.
Climb back up the blocks and through the trapdoor. Climb over the wall of blocks and return through the lounge and up the steps. If you didn’t encounter the bad guy with the gun earlier, he’ll appear near the exit. Kill him and take his small medipak and Uzi clips.
Outside the BLACK-AND-WHITE LOUNGE, turn left. The doors in the corner leading to the ELEVATOR are now open. Do not rush in, since there’s no elevator there yet, and the bottom of the shaft is lined with broken glass.
ELEVATOR BETWEEN LOWER AND MIDDLE LEVELS: Pull the switch once to call the elevator. Pull it again and then step into the elevator and ride up. When the doors open, step out. Then pull the switch here to send the elevator down again. Take a diagonal standing jump to grab the ledge above the ladder inside the elevator shaft. This jump is a little tricky, but if you start on the seam between the two floor tiles Lara should make the grab. You can also run over the top of the elevator as it descends and then grab the ladder.
Climb to the top of the ladder, pull up into the passageway, and go to the right. Take a running jump over the broken glass into the hallway on the other side of the pit. Kill the goon with the club who comes around the corner. Pick up the shotgun shells and continue to an opening overlooking the big sculpture. Take a running jump over to the flattish part of the sculpture, where it meets the wide ledge with shards of broken glass.
NOTE: If you miss this jump and slide down the sculpture, it’s OK. Just return to the elevator and ride up again. There’s a flat ledge just outside the elevator. You can jump over to the statue from there as well.
Walk through the broken glass and pick up 2 sets of Uzi clips. Then take a standing jump from the edge of the ledge with the glass shards to the ledge with the stars. Pick up the DOOR CIRCUIT and large medipak. To get back, take a running jump from the star ledge over the glass to land on the sculpture. Then slide down to the floor.
DARK STREET: Cross the ATRIUM to the SWIMMING POOL. Use the DOOR CIRCUIT in the electrical panel on the far wall to open the double doors. Stay sharp, though. Someone left a cage open, and there’s a Tyrannosaurus rex running loose in the street. If you want to kill it from a relatively safe spot, climb into the opening in the cement wall just inside to the left. If you’re short on flares, there’s a box on the ground a little to the left of the raised opening.
EXPERT CHALLENGES: There are a few interesting things you can do in this area by exploiting useful glitches in the game. Rather than clutter up the main walkthrough, I’ve included them in a footnote.
A short tunnel on the far side of the street can also be used to hide from the dinosaur. There are entrances on either side of the building straight ahead, and inside the tunnel you’ll find the AUTOMATIC PISTOLS and 3 sets of clips. Just watch out for the nasty guy with the club who comes around when you pick up the guns.
After you’ve killed both man and T. rex, follow the street away from the black-and-white c|net van parked near the entrance. This street leads into an open area with another van. In the square depression to the right of the second van, you’ll find the ELEVATOR JUNCTION. Picking it up triggers the appearance of a second T. rex. If you want to, you can take shelter in the small room with the black-and-white tile floor and the Bartoli poster hanging above it. Pick up the flares and large medipak lying on the floor but note that when you grab the health, another enemy with a club approaches from across the street. Deal with him and then finish off the second dinosaur.
When the coast is clear, go down the ramp into the cage and pick up SECRET #2, the gold bars. Grab them and return to the ATRIUM.
CLIMBING THE SCULPTURE BACK TO THE UPPER LEVEL: Climb the side of the sculpture that faces the SWIMMING POOL—upward, a little to the right and then up again to a flat spot with some Uzi clips. After picking up the ammo, walk to the top of the slope and turn a little to the left so Lara is facing the right side of the steeply angled slope on her left. Then take a standing jump onto the slope, slide back, and grab the edge.
NOTE: When making this jump, be sure to aim for the left side of the slope. If Lara lands too far to the right, her feet will touch the slope below before she can grab and she’ll slide down to the floor. Then you’ll have to climb back up again.
Climb to the right and continue scaling the main vertical part of the sculpture. As you climb, count the seams between the textures on the side of the sculpture, not including the seam where you start. There’s an angled seam, then a horizontal seam, then another horizontal seam. Position Lara’s hands on this third seam and press Jump (or Jump + Roll) so she leaps off the sculpture and lands on the jutting cement ledge behind her.
Move forward into the HALLWAY WITH GARISH CARPET and vault up onto the carpeted step ahead. Shoot the 2 bad guys with clubs who come down the ramp. They don’t drop any goodies, but there are 2 sets of automatic pistol clips in the alcove at the bottom of the stairs and 2 sets of Uzi clips in the alcove near the first landing. Continue to the top of the ramp and exit this room into the UPPER LEVEL of the ATRIUM.
ELEVATOR BETWEEN UPPER LEVEL AND ROOF: Follow the black-and-white tiled walkway around to the BROKEN ELEVATOR in the opposite corner of the room. Like the other elevator shaft on the lower level, this one is lined with shards of glass so take care not to fall in.
NOTE: There is a ladder at the back of the elevator shaft, which Lara could jump and grab; however, the elevator car above prevents her from climbing all the way to the top of the ladder. So ignore it for now.
Place the ELEVATOR JUNCTION in the electrical panel. Then pull the switch to call the elevator. Pull the switch again, get in and ride up to the top floor.
ELEVATOR SHAFT, ROOFTOP AND BIRD MONSTER CAGE: The cage belonging to the BIRD MONSTER connects to this area via the passageway on the right. As soon as Lara steps out of the elevator, the monster begins making its way up this passageway toward you. If you don’t care about getting all the pick-ups, just wait for the creature to approach, run back into the elevator, and shoot it from safety. Once it falls, the level ends.
If you do want every item, including the last secret, you’ll need to avoid the monster as you make all the pick-ups and then kill it. Start by exiting the elevator and heading to the left. Run forward along the blue-tiled floor. Turn right and take a running jump over the glass shards. Make a U-turn around to the left. Run forward and then slow to a walk as you carefully retrieve the large medipak sitting in the broken glass. Step out of the glass and pick up the 2 sets of Uzi clips in the corner.
NOTE: If you have a few medipaks to spare, you can leave this one to save time. Or you can make two trips, luring the bird monster down the hall away from the goodies before returning. If the monster catches up with Lara while you’re picking up the items, try and get out of its way and use a medipak or two to repair the damage. It needs to pound Lara several times to take all her health.
After picking up the health and ammo, run back around to the right toward the hallway with the elevator. Jump over the broken glass, turn left, run past the elevator and then turn right. The monster will be hot on Lara’s heels, so take running jumps where it’s safe to do so. Follow the blue-tiled hallway down several ramps, jumping over 2 more fields of broken glass on the way.
At the bottom of the ramps is the BIRD MONSTER’S CAGE with SECRET #3, the gold skull. Grab it as quickly as you can, roll, and run/jump past the monster, who will have caught up with you by now. Then head back up the ramps toward the elevator, again jumping over the glass as you go.
Run back to the elevator and pull the switch to send the elevator down. Once it moves down below floor level, run over the top of it and grab the ladder on the inside of the elevator shaft. Climb almost to the top. Then backflip to land in the opening behind. Here you’ll find a large medipak and 4 boxes of shotgun shells. Walk away from the elevator shaft to the other side of this little room. Turn around, drop and hang from the edge. Then climb down the ladder and drop into the blue-tiled hallway below.
At this point, you can move out onto the open roof to fight the monster. Just watch out for the broken glass hazard in the doorway. Or, if you prefer, use the switch again to bring the elevator up. As you wait for the elevator to arrive, safety-drop into the shaft to avoid the monster’s pummeling fists. As soon as the top of the elevator reaches the opening, step off, and then hop back into the elevator when the doors open.
Alternately, after climbing down from the little room with the shotgun shells, pull the elevator switch, roll, run around to the left and jump at the edge of the elevator shaft to grab the ladder on the back wall. Then climb down into the elevator as it rises. Lara should climb right through the ceiling of the elevator ending up inside it. If you’d rather not “cheat” this way, instead climb all the way up the ladder and backflip onto the ledge where you found the shells and medipak earlier. Then climb down the ladder on the other side and drop back into the blue-tiled hallway. By the time you get there, the elevator will have risen and you’ll be able to run inside.
You can shoot the monster from inside the elevator, and it won’t be able to reach Lara. When it falls, that’s the end of the level and the game.