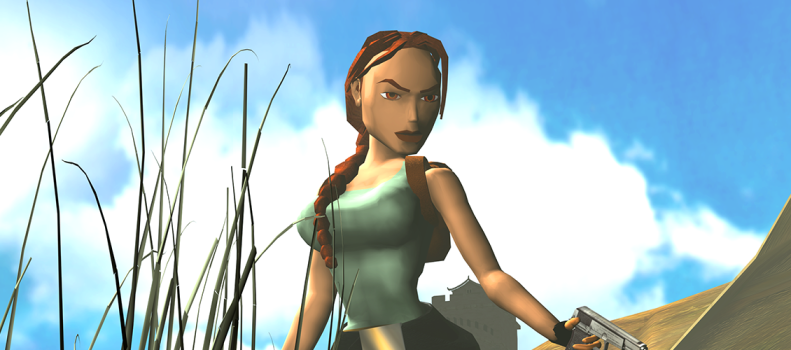
This is the walkthrough and video walkthrough for Tomb Raider II: Starring Lara Croft. Find all the secrets and puzzle solving below. The video walkthrough was extracted from Youtube thanks to Tartancroft and the text walkthrough thanks to Stella.
1. The Great Wall | 2. Venice | 3. Bartoli’s Hideout | 4. Opera House | 5. Offshore Rig | 6. Diving Area | 7. 40 Fathoms | 8. Wreck of the Maria Doria | 9. Living Quarters | 10. The Deck | 11. Tibetan Foothills | 12. Barkhang Monastery | 13. Catacombs of the Talion | 14. Ice Palace | 15. Temple of Xian | 16. Floating Islands | 17. The Dragon’s Lair | 18. Home, Sweet Home | Croft Manor (Tutorial)
17. The Dragon’s Lair
ENTRANCE AND LARGE, SQUARE ROOM WITH PETRIFIED GUARDIANS: A small door rises to reveal a petrified spearman. Don’t worry; he will not awaken yet. Pick up the large medipak and 2 sets of Uzi clips from the floor and slip past him into the next room.
The second spearman, on the opposite side of the room, comes to life as you enter. Take care of him.
The first spearman only animates if you use the switch in the alcove where the second spearman was standing. Doing so also closes the door where you entered, sealing you both inside the room. You don’t have to destroy him to move on. So if you’d rather not fight him, just leave that switch alone.
If the grenade trick from the previous level works for you and you have grenades to spare, you can use them here on some or all of the remaining petrified guardians. I recommend that you save about 15 grenades for the dragon itself.
In order to get to the next room, you must awaken the third and fourth spearmen. Locate the second switch to the left of the entrance. Pull it to open the exit and animate the guardians. Destroy them and then advance carefully into the next room.
DARK ANTEROOM WITH MANY PILLARS: There are 6 cult members lurking among the pillars. You can draw them out two at a time by advancing slowly into the room with weapons drawn. As soon as the first two emerge from hiding, back out of the room and jump from side to side while firing to avoid their throwing daggers. Uzis work well here, and you’ll have a chance to pick up more ammo afterward. Repeat the same strategy for the next pair of enemies. For the last two, advance farther into the room and fight them as they appear. When they’re all dead, recover their stuff: large and small medipaks, 6 sets of Uzi clips and a MYSTIC PLAQUE. Use the Plaque in the receptacle beside the gate to open it. Go through, follow the hallway to a short ramp and slide down into the Dragon’s Lair.
BOSS FIGHT – BARTOLI–DRAGON: Marco Bartoli’s body lies on a low platform at the center of this huge room. Don’t get too close yet. When you approach, he magically transforms into a huge DRAGON, and the final boss battle begins. You may want to pick up a few items first, and this is much easier before Bartoli changes.
Below the floor is a water-filled room containing 10 sets of Uzi clips and 2 large medipaks. The square holes in the floor lead down there. If you’re careful, you can retrieve most of these items before Bartoli transforms. The change only occurs when Lara steps inside the “trigger zone”, which extends for one square around all sides of the central area with the four columns. As long as you avoid this area—both above and below the water’s surface—you’ll be safe.
To get the goodies begin at the nearest hole on the left side of the room. Drop in and swim down and forward, keeping the wall on Lara’s left. Take the medipak. Then continue forward along the left wall. You can grab the 2 ammo pick-ups just ahead, but be careful not to go any farther to the right. Surface in the third hole and climb out of the pool. Just be careful not to climb out on the right side of the hole, since this is inside the trigger zone. Turn right and follow the back wall of the room to the next square opening, again taking care not to get close to the pillars. Drop into the pool, pick up the other medipak and swim forward, again staying close to the left wall. At the next corner, turn right, pick up the clips and continue forward, still keeping the outer wall on Lara’s left. Now you’re heading back toward the hole where you first dropped in. Ignore the ammo pick-up just ahead on the right, since it’s inside the trigger zone. Pick up the clips directly ahead and then surface in the hole and climb out. You should now have all but 2 of the available pick-ups.
If you accidentally trigger the dragon transformation while underwater, it can be difficult to climb out without getting toasted by the dragon’s fire breath. Either reload or swim up to one hole to get the dragon’s attention and then quickly dive down again. Swim to another hole on the opposite side of the room and climb out as quickly as you can. The dragon may not be able to get there as fast as Lara can.
Once you have all the goodies, save the game and get ready to fight. I have several strategies for defeating the dragon.
Direct confrontation: Draw your weapon of choice. I recommend the Uzis. It takes about 300 Uzi rounds to bring down the beast, but they have the fastest fire rate, Lara is still very maneuverable while using them, and there’s plenty of ammo available (see above). Now approach the middle of the room to trigger Bartoli’s transformation and leap out of the way as the dragon appears. Immediately start shooting and evading, and whenever the dragon breathes fire, quickly side flip out of the way. If you move around the dragon—essentially chasing its back leg as it chases you—you can avoid its fire breath. But don’t get too close to its body, since it can stomp Lara to death with its mighty feet. Use the pillars for cover if necessary, and try not to fall through the holes in the floor.
If Lara does get lit up, either reload or drop into one of the pools to put out the flames. To climb back out of the water without getting toasted, use the same trick described above in the strategy for getting the items in the flooded room below the floor: Surface in one of the holes, wait for the dragon to notice Lara and approach, then immediately swim under to the opposite side of the room to climb out. The dragon will take a few moments to figure out what happened.
Sneakiest and easiest method: Approach the center of the room on the left side, staying behind the pillar. As you move close to the pillar, you’ll enter the trigger zone and Bartoli will transform. As soon as the dragon appears it will start blowing flames, but the pillar should protect Lara. Hop back once and then pivot to the right so Lara is facing the dragon’s body. He won’t come around the pillar if you’re positioned correctly. Equip the grenade launcher, which allows you to hit the dragon without actually having to get a target lock on it, and start firing at its back leg/belly. If you hit it squarely each time, it will take exactly 10 grenades to bring it down. Earlier I suggested saving about 15 grenades in case you miss a few times as you’re lining up your shot.
-OR-
Alternate sneaky method: If you don’t have enough grenades, you can use Uzis or even pistols, but you’ll need to be more careful about where you stand. Move into the same spot, behind the left pillar, to trigger the transformation. Then, when the dragon starts breathing fire, carefully back away from the pillar just a few steps. Not too far, though, or the dragon will come around the pillar toward Lara. Now observe the rhythm of the dragon’s fire breath. Notice how the pillar lights up when the flames hit it, followed by a brief pause between breaths. Draw weapons, wait for the dragon to blow a plume of fire that lights up the pillar. Side flip to the right, so Lara can get a target lock on the dragon, and start shooting. Then immediately flip to the left so Lara lands behind the pillar before the next blast can hit her. You can continue to hold Action to maintain the target lock. Lara should stop shooting once she’s behind the pillar and no longer has line of sight. Now just keep repeating this as long as it takes, adjusting Lara’s position if necessary to make sure she lands safely behind the pillar.
-AND FINALLY-
Move in for the kill: Whichever method you use to fight the dragon, once it has taken enough damage—10 grenades or about 300 Uzi rounds—a bright flash will illuminate the whole room, the dragon will raise its head with an agonized roar, and magical sparkles will swirl around the dagger wound on its belly. Then the dragon will fall down stunned. At this point, you have about 10 seconds to run up to it and press Action to pull the DAGGER OF XIAN from its belly. This is the only way to defeat it permanently. If you don’t get the dagger in time, the dragon revives and the whole ordeal starts again.
You may want to save the game in a new slot as soon as the beast starts to fall. That way, if he revives, you can reload and try to grab the dagger without having to fight him again.
When you do stun the dragon, don’t wait for it to hit the ground. As soon as you see the bright flash and the dragon lifts its head to roar, indicating it’s about to fall down, holster your weapons and run toward it. Run straight to the dragon’s belly, stand facing the bloody spot and press Action to pull out the dagger. If you’re having trouble doing this, try sidestepping so Lara’s right hip is directly in front of the red spot where the dagger is. Or, jump straight up to land a little closer to the dragon and try pressing Action again.
CUT SCENE: Lara pulls the dagger from the dragon’s belly and examines it.
When you’ve got the dagger, the exit opens and the place starts to collapse. If you like, you can now go into the water underneath the floor and pick up the rest of the goodies. They won’t carry over to the next level, but if you’re after a perfect item score, it’s possible. The earthquake is mostly for show. There’s no time limit to reach the exit, but you do need to watch out for the flames and falling rocks as you follow the passageway to end the level.


