Walkthrough

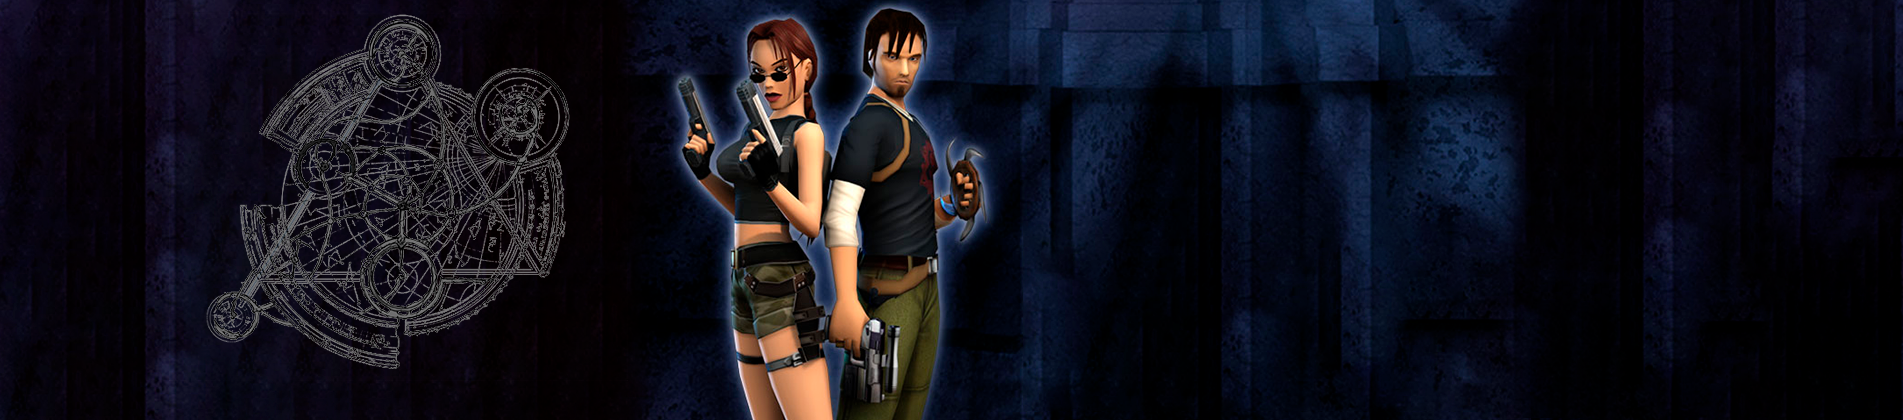
In this section, you will find the complete guide in text and video format for Tomb Raider: Angel of Darkness. This is the first video game that debuted on PS2. The video guide was taken from YouTube, all credit goes to the user CroftEd.
1. Parisian Back Streets | 2. Derelict Apartment Block | 3. Industrial Rooftops | 4. Margot Carvier’s Apartment | 5. Parisian Ghetto | 6. The Serpent Rouge | 7. St. Aicard’s Graveyard | 8. Bouchard’s Hideout | 9. Louvre Storm Drains | 10. Louvre Galleries | 11. Archeological Dig | 12. Tomb of the Ancients | 13 – 17. The Hall of Seasons | 18. Galleries Under Siege | 19. Von Croy’s Apartment | 20. The Monstrum Crime Scene | 21. The Strahov Fortress | 22. Bio-Research Facility | 23. The Sanitarium | 24. Maximum Containment Area | 25. Aquatic Research Area | 26 – 27. The Vault of Trophies & Boaz Returns | 28 – 29. The Lost Domain & Eckhardt’s Lab
13-17. The Hall of Seasons (Part 1)
You are entering a small hallway with four paintings. Above each painting is a symbol, and below each painting is a slot where you must place the four crystals. You need to find the four crystals to place in the correct slots. When you enter the large circular room, you will see a knight on your right. It takes about five shots from the shotgun to kill him.
Don’t shoot him while he has his shield up. You can get behind him and shoot him from behind. He regenerates, so try to do as much damage as you can while he’s dead, or simply avoid him. The floor has a circle with another circle in the center divided into four parts.
Each of these sections will lead you to various challenges. When you stand on one of the sections of the circle, three doors will open. Each door has a lever at the end of the hallway.
You have to pull the correct lever to get through the large door in the center, because if you pull the wrong lever, you will fall into a very difficult place that you will have to get out of once you have the four crystals. If this happens, you need to find the elevator to get back to the main hall. The elevator is usually on the left.
You can open the doors in any order, it doesn’t matter, the important thing is to get the crystals… to find the crystals you have to complete the following levels:
If you fall into the Pit of Damnation, you can follow this part of the guide.
If you fall into the pit of Damnation, you can follow this part of the guide.
Once you have obtained all four crystals, you can continue with part 2 of The Hall of Seasons.
The Breath of Hades
The wind of Hades is symbolized by three waves of wind coming out of the right side of the emblem. Enter through the right door and pull the lever to open the doors. Enter through the doors. Turn right and push the wall inward. Go to the back of the room, take the first aid kit, and pull the lever.
The lever will open a gate at the back and lift the wooden logs that you must cross. Start jumping when the winds stop blowing to the right in front of you. Then jump to the second log in front. Now jump diagonally to the right. From there, jump to a log that is diagonally to your left, directly in front of the threshold to the back.
Jump over the next log and the threshold and take the crystal. After you take the crystal, the wind will stop blowing. Jump back over the same logs. Go to the exit, head to the main room, and insert the crystal under the painting in the corresponding hallway. Watch out for the knight.
The Sanctuary of Flame
Enter the hallway on the right and pull the lever. Enter the room. This is a fairly easy test, but it may require careful positioning. You need to jump from block to block to get your crystal. There are fire bombs that can hurt you but not kill you. Move quickly, but carefully.
When you jump, some of the platforms will disappear after a certain amount of time, so make sure you are standing on a hexagonal block that does not fall into the fire. Walk toward the edge. As you walk, some blocks will fall or fly away, leaving you in a difficult position to pass. Jump onto the platforms in front of you carefully. If they are a little far away, run and jump (press the walk button and Lara will not fall). Jump forward, to the right, and to the left again.
Jump to the middle block. Run and jump to the four small blocks. The two rear ones will fall. Jump to the base of the stairs. Climb up and get the crystal. Turn around and stand on the edge of the stairs; you will see that you have fewer blocks to jump over. You must now jump onto the floating platforms. Jump onto the middle platform from the stairs (three steps before the fire) and jump onto the block in front of you.
Turn right and jump onto the lowest floating platform. Jump and grab onto the platform above you, then climb up. Jump onto the platform in front of you. Then jump to the left below you. More floating platforms will appear and lead a path to the exit door (the door through which you entered the sanctuary of flames). Go towards them and leave the room. Return to the hallway in the main room and insert your crystal.
Wrath of the Beast
The Wrath of the Beast has a symbol that I can’t define, but anyway, let’s move on to the facts. Enter through the door in the center and pull the lever; the door will open. You’ll see that the floor has collapsed, so we’ll try to make our way to the back. This requires synchronization. Some of the stone pillars will fall when you jump on them. Walk to the left until you reach the end. Jump to the column in front of you.
Turn right and run, jump forward before the floor falls away, you will land on a small platform, slide left along the ledge that gets bigger. The portion of the floor that is connected to the wall will not fall away. Walk on it to the edge, but don’t stand on the block that is slightly below you. Look at the cave. This is a run and jump move.
Jump to the block in the background with golden light. Grab the edge to climb up the ledge. The floor behind you will hit the ledge. Climb up, immediately jump sideways to the right. Turn right. You have a short amount of time here to position Lara close to the left wall, walk forward, and then jump through it. Turn right and move quickly forward.
There will be a safe area at the end of the ledge. Jump to another part of the floor in front of you and quickly move forward again (run and climb). The ledge will fall if you don’t do it fast enough. Now you need to reach the right block at the back. This is a safe area. Look to the right. Jump and grab the ledge, climb up. Once again, the floor will fall, so move quickly by running and jumping.
Take a short break, then jump up and grab the edge and climb up. There is a stone path in front of the doors. If you look down the path, you will notice that some blocks are slightly raised. Run to that block, pause briefly, then jump onto the ledge in front of the doors. Take the ammunition and something else. Take your crystal.
The floor will magically appear, but so will three knights with flaming swords. Use your health packs and water to stay alive. There is water at the ends. There are two levers on either side of the hole in the floor. Pull both levers, avoiding the knights as much as possible, and exit through the door.
Neptune’s Hall
Enter the room on the left and pull the lever. There is a knight shooting fire in this area, but you can avoid him. Go to the back of the room to a small room with a figure pouring water from its mouth. Jump into the pool. Swim straight ahead and to the left. Be careful of the blades at the entrance to the room.
Swim through them and pull the lever. Return to the opening where you entered, get out of the water, go to the previous room where the fire-breathing knight is, and jump into the hole in the floor that is now filled with water. Swim toward Neptune’s face. Behind him, on the right side, there is an opening. Enter it and pull the lever. Come up to the surface, and above this opening there is a small opening.
Get out of the water and enter this opening to grab the ammunition. Dive down and above Neptune’s head there is another entrance where you can grab a first aid kit. To the left of Neptune’s head, there is another entrance to the pipe system. Climb up and go left. Drop into the water bucket on the floor. Turn left. There is a first aid kit. Continue through the pipe ahead to a square entrance. Swim right through the broken grate.
At the end, there is a place to breathe. There is interference here when you want to move Lara forward to see the outside of the pipe. Dive down and swim back through the knives. Go to the end and turn right to get air. Dive down, go straight through the tunnel, and you will enter a room.
The crystal is beneath you. Once you have taken the crystal, you can go up to get some air or down to the middle of the pedestal to pull a lever. If you took a breath, go back for the lever. The lever opens the door beneath Neptune’s mouth.
Go up to the door that just opened and follow the path that will take you to the opening at the back of the room (under the fountain). Get out of the water and head for the exit, toward the main room with the knight. Reach the lobby and place the crystal in the indicated frame.
Pit of Damnation
Once you have completed the levels to obtain the crystals, place them. They do not need to be placed in any particular order, as Lara will take care of placing them in their respective slots herself. Simply bring her close to the slots, be careful, and keep an eye on the knight, who will not be very helpful in this task. Try to knock him out and then quickly place the crystals.
Now a scene will show you the seal on a door opening. What a coincidence! It’s located in the Pit of Damnation. Press the wind button and enter through the central door. Pull the lever and the trapdoor in the floor will open. Go down the hallway and fall down. Pick up the Large First Aid Kit, continue straight ahead, and look out. You will see a spiked roller on your left.
Run to your right, jump over the pit, and you will see the wooden door. Go to it and open it, go down the spiral staircase, wait for the trapdoor to open, and pull the lever. You will now find yourself in front of a cauldron surrounded by gears and lava pits. Go to your left and turn the valve. Now go back and look to the left, where there are some stairs. Go down them and run and jump onto the wooden beam in front of you, then go up the stairs.
Halfway there, do a backflip, walk along the wood until you reach another ladder, climb it, and once at the top, turn the valve, go down the stairs, and look for the other stairs. You will see that you cannot reach them, so hang from the edge and climb down. Once down, walk straight ahead and you will see a chain leading to the boiler. Grab hold of it and cross to the other side. Go around the boiler and go down the stairs. Be careful, as a skeletal knight awaits you below. The best thing to do is to kick him twice and throw him into the lava so he won’t bother you anymore.
Right in front of you, go down to the esplanade with the gear and collect some ammunition. Now go back to where you activated the first valve. Once you are at the top, jump to the center, where the boiler is. Go around it again and look for another chain. Slide down it to the other side, where there are some wooden boards. Go up the stairs and turn the valve on your right.
Now go back to the center where the boiler is and hang from one of the edges to the platform below. Remember to hang from the edge and when you release, quickly press action again so that you grab onto the board below. Climb up and go around the boiler in search of the last valve. When you turn it, a mechanism with rotating blades will be activated, so be careful. On that same platform, try to find the chain to get to the other side.
Once on the other side, climb down to the ground, and if you don’t want to jump over the blades, climb down and then hang from the wooden edge of the lava pit until you reach the other side. Once you pass the blade, climb onto the wood and head towards the stairs. Walk along the wood to the next stairs and exit the level. To open the door, pull the lever again, climb the spiral staircase, and exit through the wooden gate.
Now turn left and jump over the two pits. You will reach an area with spikes. Look carefully and walk in an S-shape to avoid getting pricked. Then jump over the other pit on the right side and you will find the spiked roller.
As soon as you arrive, the roller will start moving backwards, so hurry up and go through the entrance on the right, then go out and jump over the pit. Once you’re on the other side, run through without stopping for a minute, because a blade propeller will come out of the wall. Once you’ve passed it, go through the door on the right, where you’ll find the damn elevator. Get in, pull the chain once, turn around and collect the Bandages and Cartridges, pull the chain again, and you’ll be back in the station room.
Hall of Seasons (Part 2)
Once you have placed the four crystals, go through the door with the water symbol, but this time pull the lever on the right, and you will fall down.
This guide will help you navigate the hellish trap you fell into when you pulled the lever. You appear in a hallway; walk down it and drop down. There is a large first aid kit at the base. Exit and turn left. Carefully pass the blades on the sides, go through the elevator door, and reach the rotating fan of knives on the left. When it is horizontal, cross the bridge, jump over the pit in front of you, and on your left is another room. There is an object there; take it and go back, jumping over the other pit.
Look at the floor, there are two pits on either side and blades on each side below. Lie down on your stomach and crawl over them. Get up and keep walking, jump over the next pit on the shorter side, which is on the right, jump over the next pit again, and you will reach a door with a plaque in front of it. Now you can open it. This is the door that was opened by placing the four crystals. Go in and go down the stairs.
Pull the lever. Walk into the circular room. Turn left. There is a wind symbol. Turn the valve. Return to the end of the platform where the ladder is. Run and jump onto the platform in front of you. Take the ladder going up, jump backwards to enter the hole in the wall.
This will take you to the symbol representing the Wrath of the Beast. Turn the valve. Go back down the ladder. Jump to the platform where you were originally. Jump to the top of the middle unit. Find the line to cross to the other side, walk along the ledge to the left, and climb the ladder. Activate the valve with the water symbol and return to the central unit via the line again.
Hang from the ledge above the area with a ladder and jump down to the ladder below. Get up and walk around to the back of the unit where the symbol is. Turn the valve. The oven will now heat up. The posts around the unit have rotating blades. Go to the right. Walk to the blades and wait for the lower part to pass, then go through. Go down the ladder. (You actually have plenty of time to run around the circular opening and avoid the rotating blades).
You may lose a little health, but not much. Be careful of the rotating blades and spikes. You need to jump over the spikes and run over the blades on the right. Consider using the ladder to go up. There is ammunition below, but also a knight. You can fight him to throw him into the fire and get rid of him forever. Go up and walk across the platform.
Take the next staircase up. You should be on the platform where you entered the room. Go to the top of the stairs, press the lever, and wait for the door to open. Go to the elevator. You can go either way; each side has its own dangers. I think the left side is easier. The elevator room is beyond the blades that rotate horizontally/vertically. Go up the elevator and collect the bandages and ammunition again once you get the health and shotgun ammunition.
Return to the elevator and pull the chain again to go back to the main room, i.e., the station chamber.
Return to Hall of Seasons
Now that you are back in the circular room of the chamber of seasons, you will notice that four of the sections of the circle in the center are now pillars that rise and fall. Look for the lowest one. It is the closest to the pile of rubble. Jump on it. Turn right and jump on the next one.
Turn right again and jump. You should now be on the highest pillar. Face the circular metal structure in the center, jump and climb onto it. Walk around until you see the flat horizontal platform; the others are curved. Follow it to the end and jump over the railing, heading to the right.
As you run around the corridor, a knight will emerge from the wall. Ignore him and continue until you reach the bars and some stone stairs. Climb them and continue running to your left. You will encounter annoying skeletons along the way. Shoot or hit them so that they fall to the floor below.
When you reach the end, you will see a lever. Approach the wall to climb it, look up and then to your right, climb down and pull the lever. A cutscene will show you the door that has opened. Go to it and enter, collect the cartridges, and then push the wall on the right. This will give Lara strength.
Pick up the Large First Aid Kit and go back to where the lever that opened the door was. Now climb up the wall to the height of the lever, then look for a small platform and rest there. Position Lara facing the lever below or the door. Now you have to hang on your left, so hang on and without wasting a second, go to the left edge. It’s almost invisible, but when you get there and turn Lara so that she is facing the room and the stones, she will turn on her own and you can continue climbing.
It’s a bit tricky because of the orientation, and if you waste too much time, Lara will fall, but it’s not impossible. Once you’re up there, look to your left and you’ll see a round room. Go through the drawbridge door and walk down the hallway, turn left, and go through the two doors.
The Obscure Brother
A video scene will show Lara approaching the tomb and reading the words (Ultra Vigilis Umbram Ecce Veritatis). Once she has done this, the game will begin. Quickly crouch down on the ground and crawl on all fours.
Now, to get our bearings, go to the entrance door, turn Lara to face the tomb, and then look to the left, pick up the Shotgun, Cartridges, and Large Medkit, and then repeat the same operation but this time on the right side, pick up the Cartridges, and return to the door. Once there, save your game. Do all of this while crouching; don’t even think about standing up.
Now comes the tricky part. Try to position Lara at a safe distance from the blue light. Remember, if you get too close, she will disappear. Try to stand facing the blue light, with the red ghost facing you or at an angle where Lara can aim at it. Do all this while crouching, shoot the ghost, and when it stops (remember that it remains motionless for a few seconds), you will have defeated it.
Note: There is ammunition and a shotgun around the room. It takes time, but it’s not impossible… Start by crouching down and crawling on all fours through the room to avoid being touched by the ghost. As long as you stay crouched down, it won’t hurt you.
Get up, run to the blue light, put away your weapon, and press action so that Lara picks up the light, which is actually one of the Dark Paintings. Crouch down as soon as you have it and crawl to the door through which you entered the room. Crawl down the stairs, stand up for a second, and jump into the water. Move forward to the end and pass the level.
Tomb of the Ancients II
Run out the door. The hallway is partially filled with water. As you walk forward, a scene will appear. The lobby will be completely filled with water. Swim straight up where the water came out.
Swim through this room to where there is a ledge with bandages. Dive down toward the bridge that does not have a grate on the floor. Underneath that bridge is a lever. Pull it. It will open the grate at the back of the room.
Don’t come back up to the surface to take more air. Dive back down. Head to the bottom through the grate. Swim to the door on the right, open it, and you’ll gain strength. If you haven’t gotten your shotgun yet, now is your chance. Come up to the surface and take more air. I recommend taking a health pack or two.
Swim around and look for the entrance you used the first time you entered the ancestral tomb. This will take you to the archaeological excavation site. Before that, if you want, you can go down to the ruined bridge on the left side of the entrance. The locked trap door you saw earlier is now open. Dive inside to grab some bandages.
Archeological Dig II
You appear outside the archaeological excavation site. Go to the right. Climb onto the box. Jump to grab the top of the fence and jump over it. Walk to the right and approach the blue doors.